One of my favorite foods used to be onion rings. I didn't eat them often, but it was a treat to get them once or twice a year at a place like the Varsity, or a local festival. When I was diagnosed with multiple food allergies, I thought I'd never eat an onion ring again. Until, one day, I decided to make them myself. I've tried a couple of methods now, and the recipe below is a true winner. You will not know the difference between these onion rings and their traditional counterparts.
This recipe is not complicated, but it is labor-intensive, so make these on a day when you have a lot of energy and stamina. It's also good to make them on a day when you can open the doors and windows, because the process will make your kitchen smell like frying oil and onion rings. Tip: I use the fryer under the range hood with the exhaust fan on high to help the smell factor. Also, the stove top is heat-resistant, so it is a good place to put the fryer. The smooth stovetop is also easy to clean up after frying (some spatter is inevitable).
Finally, I would highly recommend watching Alton Brown's Good Eats episode on onion rings. He uses leeks (I can't wait to try that) and his how-to demonstration of the whole process is very useful.
The best gluten free onion rings
Ingredients
- Sweet onion, such as Vidalia
- White rice flour
- Your favorite gluten free flour mix (I used this one)
- Sea salt
- Ground black pepper
- Eggs, beaten
- Any high-temperature cooking oil that you tolerate
Method
To prepare:
Slice onions using a knife or mandolin. You can make them as thick or as thin as you like, but it helps to keep them a consistent size, so they cook evenly.
Set up your onion ring assembly line:
Step one: plain white rice flour (just put some on a plate)
Step two: egg wash (just stir a couple of eggs in a bowl)
Step three: GF flour blend + sea salt and black pepper to taste (again, just put some flour on a plate, add some salt and pepper, and mix it all up with a fork)
Coat your sliced onions in each of the above coatings (in order). Repeat until all onions are coated. (Watch Alton Brown's video mentioned above for the perfect way to do this)
To cook:
Next, set up your frying station:
Preheat oven to 200 degrees F.
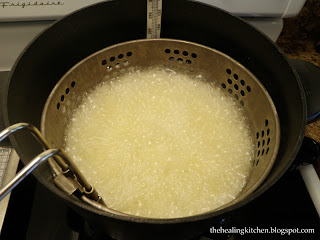
Preheat oil in fryer to 400 degrees F.
Line a baking sheet with a paper towel to absorb any oil from the onion rings. You can also put a cooling rack in your baking sheet to keep the onion rings up above the paper towel and not get soggy from sitting on the paper towel.
*Note: if you are frying at the correct temperature, you shouldn't wind up with greasy food. The temperature of the oil needs to be hot enough to quickly cook the outside and steam the inside before the oil is absorbed by the food. It is a bit of an art to get the temperature and timing just right. A thermometer is very helpful. You will be amazed how much your oil temperature changes as you cook food. This is all very new to me, but totally fascinating. Click here for more information about why frying at the right temperature won't cause your food to be greasy.
Place coated onion rings in fry basket. Do not overload your fry basket. Fry small batches at a time for the best results. If you put too many in there, it will take too long for them to cook. They will stay in the oil longer than necessary, and you will get greasy onion rings. Or they might stick to each other, or cook unevenly. You will get the best results with small batches, about like this:
before frying
The time it takes to fry your onion rings will vary, depending on how thick they are cut, how much coating, etc. Mine took 2-3 minutes to fry, then 1 minute in the basket (but out of the oil) to drain. Then empty the basket onto the cooling rack/cookie sheet.frying
draining
cookie sheet
Put the entire cookie sheet with the onion rings in the 200 degree oven to keep onion rings crisp and warm while frying the rest of the batch.Repeat until all rings are cooked, and enjoy right away! They are best right out of the fryer & oven. If you have extra, you can freeze, and reheat in the oven or toaster oven to make them crispy again.
Final note: Do NOT pour used cooking oil down the drain. You will ruin your drain. Click here for how to dispose of used cooking oil. Click here for more information on recycling cooking oil.
Enjoy!


No comments:
Post a Comment